Ingredients List

  • 2 (10-oz) package frozen cauliflower rice
  • 4 Tbsp Avocado oil, divided
  • 2 Tbsp gluten-free seasoning (like Tony Chachere’s Original Creole Seasoning, divided)
  • Sea salt and freshly ground pepper
  • 1 lb boneless, skinless chicken thighs, cut into 3/4-inch pieces
  • 3 stalks celery, sliced about 1/2-inch thick, with leaves
  • 1 red & 1 green bell pepper, cut into large dice (3 cups total)
  • 12 oz Savoie’s andouille sausage, sliced into 3/4-inch disks
  • 1 Tbsp tomato paste
  • 2 Tbsp butter
  • 1 lb medium peeled, deveined shrimp

Instructions

  • Preheat the oven to 400°F (205°C). Line a rimmed baking sheet with aluminum foil or parchment paper.
  • In a bowl, combine the cauliflower rice, 1 tablespoon of the olive oil, 1½ teaspoons of the Creole seasoning, 1/2 teaspoon salt, and 1/4 teaspoon black pepper. Toss to evenly distribute, spread on the prepared baking sheet and roast, tossing occasionally, until the cauliflower rice is dry and a bit crispy-edged, about 12 minutes.
  • Meanwhile, season the chicken pieces evenly with 1-1/2 teaspoons of the creole seasoning, 1/2 teaspoon salt, and 1/4 teaspoon pepper.
  • In a 4 to 6-quart pot oven over medium-high heat, heat 1 tablespoon of the olive oil. When hot, add the chicken and cook, turning frequently, until browned on all sides, 5 to 6 minutes total. Remove the chicken to a plate. Reduce the heat to medium and add the celery, peppers, and sausage. Cook, stirring occasionally, until the vegetables are softened and the sausage is seared in places, 4 to 5 minutes.
  • Add the tomato paste and the remaining 1 tablespoon Creole seasoning, and toss to combine. Add 1/2 cup of water and scrape up any bits from the bottom of the pan. Let the mixture come to a simmer and thicken up a little, 2 to 3 minutes.
  • Reduce the heat to low and stir in the butter. When incorporated, gently stir in the shrimp and chicken and cook until shrimp is slightly opaque and a little “white” in color, 3 to 4 minutes.
  • Stir in the cauliflower rice, season to taste with salt and pepper, and serve.

I make up a bunch and keep it on hand.

Ingredients:

  • 1/4 Cup and 2 Tablespoons Chili Powder
  • 3 Teaspoons Garlic Powder
  • 2 Teaspoons Onion Powder
  • 1-1/2 Teaspoons Crushed Red Pepper Flakes
  • 1-1/2 Teaspoons Dried Oregano
  • 1 Tablespoon Paprika
  • 3 Tablespoons Ground Cumin
  • 1 Tablespoon and 2-1/2 Teaspoons Sea Salt
  • 2 Tablespoons Black Pepper

Directions:

Mix and store in airtight container. Use 3 Tablespoons per pound of meat.

The quantity depends, of course, on the size of the clusters. Typical sized clusters, this yields about 18 clusters.

Ingredients:

  • 18 Ounces Sugar Free Chocolate Chips (such as Lily’s), Dark or Milk
  • 10 Ounces Unsweetened Coconut, Toasted
  • 8 Ounces Toasted Chopped Pecans

Directions:

  1. Preheat oven to 325℉
  2. Line a baking sheet with parchment paper. (For the final cooling step it’s helpful if it will fit into the fridge. It can cool and harden on the countertop, it just takes longer.)
Toasted Coconut Flakes

3. Spread coconut out on lined pan in a thin layer. Bake at 325℉. Check every 5 minutes and stir, being careful not to burn yourself, until the coconut is the desired color. This should take about 10-15 minutes.

  1. Being careful not to burn yourself, add toasted coconut to large mixing bowl.
  2. Raise oven temp to 350℉
  3. Using same parchment lined baking pan, spread pecans into a single layer.
Brown Sugar Pecan Cake

7. Bake pecans in 350℉ oven for about 8 minutes, until golden and fragrant.

  1. Remove pecans from oven and add to large mixing bowl with coconut, being careful not to burn yourself.
  2. Turn oven off, you won’t need it anymore for this recipe.
  3. Heat sugar free chocolate chips over double boiler until completely melted, stirring and being careful not to scorch it. Chocolate will “break” if it is overheated.
  4. Pour melted chocolate over coconut and pecans and stir until completely coated.
  5. Use a cookie scoop, or utensil of your choosing, drop and shape clusters on parchment lined pan.
  6. Place in refrigerator for about an hour, or leave on countertop, to cool until firm.

Clusters do not need to be refrigerated after cooling.

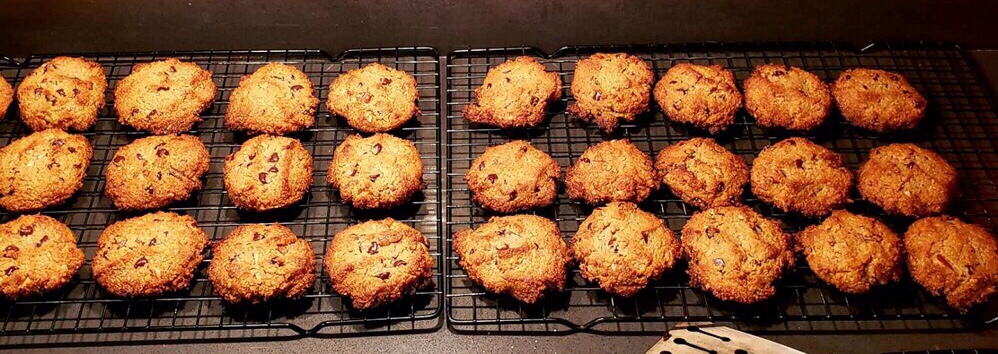
Growing up my mom would make “Everything Cookies” for the holidays. They were called everything cookies because they were every kind of cookie rolled up into one. These cookies had chocolate chips, coconut, raisins, oatmeal, walnuts, and pecans. They were my absolute favorite. Ahhh, fond memories. I adapted her original recipe to fit my Keto life, and came up with a cookie that I love almost as much.

I use a Kitchen-Aid stand mixer with the balloon whip, but a hand mixer will do just fine. This recipe makes approximately 36 cookies using the 2 Tablespoons of dough each.

Ingredients:

  • 1 Cup Cold Butter, cut into several pieces
  • 1 Cup Brown Sugar Swerve
  • 2 Large Eggs
  • 3 Cups Almond Flour
  • 2 Teaspoons Baking Soda
  • 1 Teaspoon Salt
  • 1 Cup Sugar Free Chocolate Chips
    (I use Lily’s Dark Chocolate Chips, but use whatever strikes your fancy)
  • 1 Cup Chopped Pecans
  • 1 Cup Unsweetened Coconut, toasted

Directions:

  1. Preheat oven to 400℉.
  2. In large mixing bowl, cream together cold butter and brown sugar Swerve until well combined
  3. Mix in egg until dough becomes creamy
  4. Mix in baking soda, salt, and almond flour 1/2 cup at a time, until well combined and a still dough forms.
  5. Add pecans and mix well.
  6. Fold in sugar feee chocolate chips and unsweetened toasted coconut.
  7. On parchment lined baking sheets, use a cookie scoop to form about 36 cookies. No cookie scoop, no problem; use about two tablespoons of dough per cookie.
  8. Flatten cookie balls with palm of hand or spatula, these cookies will not flatten or spread on their own.
  9. Bake in preheated oven for 8-10 minutes, until edges are brown.
  10. Remove from oven and allow to cool before using spatula to transfer to cooling rack.

This Indian dish tastes far more complicated than it is. Served with low-carb riced cauliflower for an easy and delicious weeknight meal. It can also be made in advance and put into the freezer. It freezes and reheats beautifully, which is why I doubled the original recipe. If you want to make a small batch to try, just half everything.

INGREDIENTS:

3 pounds boneless skinless chicken thighs
1/2 cup coconut oil or ghee
2 small diced onions, about 5 ounces
4 cloves minced garlic
2 Tablespoons fresh grated ginger
4 Teaspoons each Curry and Masala
1 Teaspoon each Turmeric and chili powder
16 ounce can of unsweetened diced tomatoes
1/2 cup heavy whipping cream or creamed coconut milk
4 Teaspoons coconut flour or 4 Tablespoons almond flour (optional, but recommended)

DIRECTIONS:

  • Measure out spices, dice onions, mince garlic.
  • Dice chicken thighs into 1 1/2 inch chunks
  • Heat a large saucepan over medium-high heat, add coconut oil or ghee, onions, ginger, and garlic and cook until fragrant, 3 to 5 minutes, stirring constantly.
  • Add all spices and cook for another minute or so.
  • Pour in the tomatoes, including the juice, and stir well.
  • Add diced chicken and stir to coat; season with salt and bring to a boil.
  • reduce heat to medium-low, cover, and cook for 30 minutes, stirring occasionally.
  • Remove cover, add the heavy whipping cream or creamed coconut milk.
  • Add the almond or coconut flour, if using.
  • Stir and cook for another five minutes. Remove from heat.

Serve over riced cauliflower

Prep Time: 10 minutes (Season the brisket the day before, refrigerate overnight)
Cook Time: 8 to 11 hours
Smoker Temp: 225℉
Smoker Time: 4 to 5 hours
Oven Temp: 250℉
Oven Time: 4 to 6 hours

INGREDIENTS:
  • 1 (12 lb) whole packer beef brisket
  • 1/3 Cup Himalayan sea salt
  • 2 Tablespoons garlic powder
  • 2 Tablespoon dried onion
  • 2 Tablespoons dried rosemary, finely chopped
  • 3 Tablespoons black pepper

DIRECTIONS:

Season the brisket the day prior to cooking:
Mix salt, garlic powder, dried onion, rosemary and pepper in a small bowl. Season the meat liberally. Place in refrigerator overnight.

  • Remove from refrigerator about an hour prior to cooking and allow meat to come to room temp.
  • Set smoker temp to  225℉ and preheat, lid closed, for 15 minutes.
  • Place brisket fat side up on grill grate. Smoke brisket for approximately 4 to 5 hours, or until the brisket reaches an internal temperature of 160℉ to 165℉.
  • Preheat oven to 250℉
  • Line roasting pan with foil, or use foil pan.
  • Remove brisket from grill, place fat side up in lined roasting pan or foil pan. Cover tightly with foil.
  • Place in preheated 250℉ oven* until the brisket reaches an internal temperature of 205℉, approximately another 4 to 6 hours, for a total of 8 to 11 hours smoke and cook time.
  • Remove from oven, allow to rest loosely covered for about an hour
  • After resting, slick the brisket against the grain, about 1/4 inch thick and serve.

Notes:

*The entire process can be done on the smoker, just wrap it in the foil and skip the part where it is removed from the smoker and put into the oven. Up the temp on the grill from 225℉ to 250℉.

Pork belly is one of our favorite dishes, so I purchase a big one, cook it up, portion it out, vacuum seal it and put it in the freezer; I’m all about easy meal prep. As far as the cooking, I use one of two methods. We have a Traeger smoker, and I like to use that to give the pork belly a nice smokey flavor, then finish it up in the oven; other times I don’t want to go to the extra trouble and just do the whole process in the oven.

  • Prep time: 30 minutes, overnight in refrigerator.
  • Cook time 6 hours
  • Smoker temp: 225°F
  • Oven temp: 250°F

THE INGREDIENTS ARE SIMPLE:

12 pound pork belly
1/3 cup salt
2 tablespoons black pepper
2 tablespoons smoked paprika

Mix seasonings together, I keep an empty shaker bottle on the spice rack for just this purpose.

With the pork belly laying flat, fat side up, use a very sharp knife to make cross cuts about 1/4 inch deep, but not into the meat, and about 1 inch apart. Season pork belly, let the seasoning get down into the cuts as much as possible; flip and season the meaty side. Wrap tightly with plastic wrap, then aluminum foil; refrigerate overnight.

COOKING DIRECTIONS:

First, the Traeger method:

  • Preheat Traeger to 225°F
  • Place pork belly on grill, fat side up. Close lid and smoke for four hours until it’s somewhere in the neighborhood of 160°F.

The next step can be done in the smoker, but I prefer to do it in the oven.

  • Line a roasting pan with foil, or use a foil pan.
  • Place pork belly into pan, fat side up, and cover tightly with foil.
  • Put in preheated 250°F oven for 1.5 to 2 hours, until temp reaches 195°F to 200°F
  • Remove foil, raise oven temp to 500°F and continue cooking until the skin is golden brown, bubbling and crispy, about 8 to 10 minutes.
  • Remove from oven and let rest for 10 minutes.
  • Slice and serve; cover and refrigerate remaining belly. Once it’s thoroughly chilled slice it into portions and vacuum seal for freezer.


The Oven Method:

  • Preheat oven to 275°F
  • Line a roasting pan with foil, or use a foil pan. Place pork belly into pan, fat side up, and cover pan tightly with foil. Put in preheated 275°F oven for 6 hours, until temp reaches 195°F to 200°F
  • Remove foil, raise oven temp to 500°F and continue cooking until the skin is golden brown, bubbling and crispy, 8 to 10 minutes.
  • Remove from oven and let rest for 10 minutes.
  • Slice and serve; cover and refrigerate remaining belly. Once it’s thoroughly chilled slice it into portions and vacuum seal for freezer.

After losing 130 pounds I was left with loose skin, though not unhealthy, it was bothersome. I struggled with the decision for several years, and spent many hours researching the abdominoplasty procedure. I wanted to be poso-abso-tively sure that I couldn’t learn to just accept my body as it was, after-all, this was surgery; to approach it flippantly or treat it like a haircut would be a gross dis-service to myself and my body. Obviously, I opted for the procedure, and on May 20, 2020 I underwent a tummy tuck.

I apologize in advance for “quirky-ness” of these videos; I’m but a noob vlogger. It does mark a significant moment in my history though, so like my scarred waistline, it is indelible. Difference is, my scar will greatly diminish over time, these videos will be “quirky” forever. Those are the breaks, can’t exactly ask for a do-over.